
Send your own ElfYourself eCards
Friday, December 25, 2009
Monday, December 21, 2009
One more to go...

While it was snowing and my feast of seven fishes was NOT happening on Saturday, I headed off to the craft lounge. So, another diaper bag and changing pad is done, done, done! I am really happy with how it came and I hope MarMar likes it. All it needs is a coat of Stainguard.
 Changing pad.
Which leaves just one more diaper bag to go. However, I am not going to start that one until after Christmas.
Let it Snow! Let it Snow! Let it Snow!

Try JibJab Sendables® eCards today!
Thank you to Calliope, Orpheus and Linus for a fun weekend in the snow and at the circus!
Friday, December 18, 2009
Polyjuice Potion
I took today off to prep for tomorrow's Feast of Seven Fishes and finish up any holiday shopping.
But, in the interim, I leave you with this photo.

My nephew, Orpheus, is a huge Harry Potter fan. So, after a recent haircut, he asked Pete the Barber to put all of his cut hair into a zip lock bag. Pete humored him. Last weekend when I visited, he sent me home with a lock of his hair so that, if I needed to, I could make a polyjuice potion which would make me look like him.
And so, I will leave you with this thought: wouldn't it be wonderful to be a six year old at Christmas again? I think so.
Happy Friday!
Tuesday, December 15, 2009
Multi-tasking again, yet not taking pictures
I don't know what is wrong with me. I spent all weekend at my hobbies, but somehow did not take a single picture to show you.
In addition to all the candy making, I:
Either way, you are just going to have to muddle through with me. I will try to update you on each project individually as I make progress.
In addition to all the candy making, I:
- drafted some alterations to my pencil skirt pattern and cut it out in my fabulous plaid and silver fabric
- cut a muslin for the Hot Patterns Calm, Cool and Cowl Neck top.
- did the final edge stitching and slip stitching of the Diaper Bag for MarMar
- started embroidering a onesie for my new nephew
- wrestled some more with my 3 Graces cowl neck top (I am not quite past the point where I get apoplectic whenever I think of it)
Either way, you are just going to have to muddle through with me. I will try to update you on each project individually as I make progress.
Monday, December 14, 2009
Santa's Kitchen 2009
 Peppermint bark, peanut brittle and chocolate truffles.
Spurred on by my candy-making success, I ventured another try at spiced nuts. Last year, Erato told me that she really liked my first batch once she added more salt to them. So, that is what I did. Naturally, I over-salted them. Sigh. So, I have assigned holiday spiced nut making to Phineas. Possibly permanently.
Friday, December 11, 2009
Nothing really matters, but Moi....
When I learned that Disney had acquired the Muppets, I had very mixed feelings. On the one hand, I would love to see the Muppets revitalized. On the other hand, I shudder at the thought of them being disneyfied.
However, their recent appearance on YouTube makes me cautiously optimistic.
Happy Friday!
However, their recent appearance on YouTube makes me cautiously optimistic.
Happy Friday!
Thursday, December 10, 2009
Post-Thanksgiving/Pre-Christmas Baking
The holidays always put me in mind of breads thanks to my dad and his mad bread skills. Some saint gave him Beard on Bread 30+ years ago, and since then he has churned out gorgeous loaves every holiday season. (This year I've gone as far as asking for a loaf of his wonderful cheese bread as a Christmas gift. We'll see if I am on the 'nice' list or not. My refusal to share may maroon me in naughty-land.)
I don't do yeast, but quick breads are easy. And I had cans of pumpkin left over from Thanksgiving pie making this year. So, earlier this week, I decided to get a jump on the holidays and bake up a batch of pumpkin bread. I'm not sure why I didn't blog about this recipe last year; it's excellent. It's from the King Arthur Flour Whole Grain Baking Cookbook. The bread comes out moist, pumpkin-y, just sweet enough, and rather not bad for you. I made a triple batch.
 Bread in Papa, Mama and Baby Bear sizes.
They look darker in the photos than in real life.
I ran into problems early because I realized, only after sifting the dry ingredients, that I had no brown sugar. So, I substituted 3/4 cup of white sugar and - because brown sugar is moister than white - 1/4 cup of Lyles Golden syrup. It seems to have worked out just fine - texture, flavor and moisture are perfect. My other problem was trying to fit 3 batches in the stand mixer (2 just fit; you are forewarned).
I like this bread with walnuts, chocolate bits and craisins, so I added 3/4 cup of each. Finally, I have an assorted mishmosh of loaf pans. So, I made 3 mini loafs that took about 45 minutes to bake, one normal size which took about 50 minutes and one larger loaf pan that took about 70 minutes. All came out just fine.
I've been eating the bread for breakfast and tea (brought a mini in to the office) and I am feeling very holiday-ish. I am taking tomorrow off for shopping and cooking. Santa's Kitchen will be open for business. Stay tuned...
I don't do yeast, but quick breads are easy. And I had cans of pumpkin left over from Thanksgiving pie making this year. So, earlier this week, I decided to get a jump on the holidays and bake up a batch of pumpkin bread. I'm not sure why I didn't blog about this recipe last year; it's excellent. It's from the King Arthur Flour Whole Grain Baking Cookbook. The bread comes out moist, pumpkin-y, just sweet enough, and rather not bad for you. I made a triple batch.
 Bread in Papa, Mama and Baby Bear sizes.
They look darker in the photos than in real life.
Pumpkin Bread
2 cups whole wheat flour
1 tsp baking soda
1/2 tsp each: baking powder, salt, cinnamon and clove
1/4 tsp nutmeg
1/2 cup butter (1 stick/4oz)
1 cup light or dark brown sugar
1/4 cups white sugar
3 eggs
1 tsp vanilla
1 cup pumpkin (canned)
3/4 cup nuts
3/4 raisins or chocolate bits or craisins, etc
The directions are your basic cake procedure: Sift the dry ingredients in a bowl; Cream the butter and sugar, beat in eggs one at a time, then pumpkin and vanilla. Add dry ingredients, mixing to incorporate. Stir in the nuts, etc. Dump into a greased loaf pan and bake at 350 for 50-60min until tester comes out clean. Cool on rack, unmolding after 10 min.
I ran into problems early because I realized, only after sifting the dry ingredients, that I had no brown sugar. So, I substituted 3/4 cup of white sugar and - because brown sugar is moister than white - 1/4 cup of Lyles Golden syrup. It seems to have worked out just fine - texture, flavor and moisture are perfect. My other problem was trying to fit 3 batches in the stand mixer (2 just fit; you are forewarned).
I like this bread with walnuts, chocolate bits and craisins, so I added 3/4 cup of each. Finally, I have an assorted mishmosh of loaf pans. So, I made 3 mini loafs that took about 45 minutes to bake, one normal size which took about 50 minutes and one larger loaf pan that took about 70 minutes. All came out just fine.
I've been eating the bread for breakfast and tea (brought a mini in to the office) and I am feeling very holiday-ish. I am taking tomorrow off for shopping and cooking. Santa's Kitchen will be open for business. Stay tuned...
Wednesday, December 9, 2009
Quicker Every Time
 The nearly done diaper bag
Some of the sewists whose blogs I read talk quite a bit about their TNT patterns. These tried-and-true or tested-n-true patterns - usually a basic tee, pants, skirt, dress, etc. - are ones that they have fine-tuned the fit to their body and can be whipped-up relatively quickly time-and-again. Many sewists use their TNT patterns as a jumping off point for tinkering with other patterns. Why do extensive fitting of a new pants pattern when you can simply add the new style lines and features to your TNT pants?
I was thinking about my need for some TNT patterns over the weekend while I was sewing up the diaper bag for MarMar. The bag is nearly done. It just needs some finishing details (slip stitching, top stitching, etc). Each bag I've made has gone quicker and more smoothly than the previous one. If only I had a pants pattern like this - one that would come together more quickly and smoothly each time - I would own a lot more pants.
Stopping to try on, tinker with fit and make alterations really adds hours to a project. I'd love to know that a garment is going to fit beautifully from the get go and then tinker with the style a bit. I'm hoping that the pencil skirt that I am working on will be such a pattern. We'll have to see how it turns out.
Anyway, my wish list for TNT patterns is: PANTS, and then a skirt and basic tee shirt/knit top.
Tuesday, December 8, 2009
M+C Experiment 2: Death by Mac + Cheese

Last night, at 9pm, Phineas and I left the house to take a walk. We were driven out into the cold, desperate to mitigate some of the damage inflicted on our waistlines and arteries by mac+cheese experiment #2. Oy!
Let me start at the beginning. I decided that I would try a custard-type mac+cheese recipe, since I am less familiar them. After reading a few different versions, I settled on the Cook's Illustrated recipe, based on John Thorne's original. Essentially, you do most of the work on the stove and then just crisp in the broiler. Perfect for a weeknight!
Yesterday, I arrived home ready to cook. But there was a package of bacon thawing on the counter. Apparently, Phineas did not get the memo re: my embargo on bacon. When I pointed out that the recipe called for 12 oz of cheddar, 6 tbsp of butter, a can of evaporated milk and 2 eggs - all for 1/2 a pound of pasta (cavatappi) - he relented and we compromised on adding 5 oz of cooked ham instead.
Basic preparations are: Brown 1c breadcrumbs in 2 tbsp butter while pasta cooks. Drain pasta and stir in 4tbsp butter until melted. Add mixture of evap milk, eggs, a dash of hot sauce, pepper, and most of the cheese to pasta and stir over a low heat until hot and thick (that is when I stirred in the ham).

Dump the pasta mixture into a casserole dish and top with bread crumbs and 1 oz reserved cheese. Pop under the broiler until toasted. Look how good it looks!
 Changes to the recipe: Well, there was the ham. In addition, it called for more salt than I was willing to add to the cheese sauce since the ham would be salty enough. Also, I used 10 instead of 8 oz of pasta because I worried that it would be too rich otherwise.
The good: The breadcrumb topping was perfect. I had just used a hunk of italian bread sauteed in butter. It was crunchy and buttery - exactly what you would want. I also liked that the recipe was indeed easy for a weeknight (no long baking).
The bad: The mac+cheese was so super-rich and heavy... it was too rich and heavy, even with the extra pasta added in. I'm not being demure here. You really couldn't eat a lot of it. I was done in a few fork-fulls. And, the cheddar flavor was near over-powering. It is the kind of extreme recipe that you use to show company how over-the-top rich you can make something, but it isn't the kind of mac+cheese that you could tuck into a big bowl of on a rainy night and feel a sense of comfort and calm. No. Definitely not. Cause then, you would be driven out into the rain for a walk.
The ugly: I took a small portion for lunch to work today. It doesn't reheat very well.
Final verdict: This also will not be my go-to recipe for the simple reason that I want some versatility - an ability to add what I have on hand and have a good reliable mac+cheese. I'm fairly certain I will never make this version again. And my arteries thank me. Oh well. Upward and onward!
Sunday, December 6, 2009
A few Photos
Over the weekend I visited my parents, and used the opportunity to rescue a few photos from my mom's camera.
For those of you wanting to see me as Hermione Granger for Halloween, I've updated that post.
And here is a shot of me with my new nephew on Thanksgiving.

For those of you wanting to see me as Hermione Granger for Halloween, I've updated that post.
And here is a shot of me with my new nephew on Thanksgiving.

Wednesday, December 2, 2009
Mac + Cheese Experiment Part 1: Mom's Recipe
I don't always give Mom Muse enough credit. She fed a family of 8 for years on limited means and without falling back on take-out or McD's. And some of us even got chubby on her cooking.
Revisiting the mac + cheese of my childhood seemed like a logical starting place for this experiment. So, on Saturday, the muses gathered for left over pies, favorite movies, and relaxation. And of course, I received a lesson on Mom Muse's idiosyncratic mac + cheese, which we made together to feed the crowd.
Mac + cheese is usually made by creating either a bechamel sauce to which cheese is added or by making a custard with the addition of eggs. My mom's recipe uses neither of these methods. And it doesn't have any kind of topping. Phineas was there to catch it on his iphone (not great quality, sorry). Here goes:
Grate 1lb cheddar cheese and cut 1lb velveeta into 1/2" cubes, while you cook 2lb of elbow macaroni.
 Drain macaroni, and mix it with 2 small cans of tomato sauce. Then fill the cans with milk and add it in, too.
_edited.jpg) Next, layer the macaroni with the cheese in a deep casserole dish or dutch oven. Give it a stir to make sure the cheese is pretty evenly distributed.
Next, layer the macaroni with the cheese in a deep casserole dish or dutch oven. Give it a stir to make sure the cheese is pretty evenly distributed.
_edited.jpg) Finally, take a peek in a corner of the casserole dish to see how much milk there is. The milk should come up about 2/3 of the side of the macaroni. We added a cup or so more milk at this point. Pat down the top of the casserole and put it in a 350 degree oven for about 45 minutes - until golden and crispy on top and hot throughout.
Finally, take a peek in a corner of the casserole dish to see how much milk there is. The milk should come up about 2/3 of the side of the macaroni. We added a cup or so more milk at this point. Pat down the top of the casserole and put it in a 350 degree oven for about 45 minutes - until golden and crispy on top and hot throughout.
_edited.jpg) The beauty of this dish is that it is simple to make and hearty to eat. It comes out having a very creamy and cheesy bottom layer and a crunchy, less gooey top layer. My mom explained that this satisfied both the kids (creamy/cheesy) and the adults (crispy/less gooey) in the family. She added, however, that everyone loved the gooey pockets of cheese created by the chunks of velveeta. Genius! Like I said, I don't always give my mom enough credit.
The beauty of this dish is that it is simple to make and hearty to eat. It comes out having a very creamy and cheesy bottom layer and a crunchy, less gooey top layer. My mom explained that this satisfied both the kids (creamy/cheesy) and the adults (crispy/less gooey) in the family. She added, however, that everyone loved the gooey pockets of cheese created by the chunks of velveeta. Genius! Like I said, I don't always give my mom enough credit.
Final thoughts: Although I will always love my mom's mac + cheese, I don't think this will be my go-to recipe. I just don't see myself eager to make a mac + cheese with velveeta. Sure it melts well, but it lacks character. Plus, I believe I am healthier for limiting processed foods in my diet. If I am going to indulge in mac + cheese, I want a dish that is a bit more gussied up than mom's week night stand-by. (Although, I will never turn down a dinner invitation at my parents' when mom is making hers!)
Next up: I'm sifting through a slew of recipes and will have another take on mac + cheese next week.
Revisiting the mac + cheese of my childhood seemed like a logical starting place for this experiment. So, on Saturday, the muses gathered for left over pies, favorite movies, and relaxation. And of course, I received a lesson on Mom Muse's idiosyncratic mac + cheese, which we made together to feed the crowd.
Mac + cheese is usually made by creating either a bechamel sauce to which cheese is added or by making a custard with the addition of eggs. My mom's recipe uses neither of these methods. And it doesn't have any kind of topping. Phineas was there to catch it on his iphone (not great quality, sorry). Here goes:
Grate 1lb cheddar cheese and cut 1lb velveeta into 1/2" cubes, while you cook 2lb of elbow macaroni.
 Drain macaroni, and mix it with 2 small cans of tomato sauce. Then fill the cans with milk and add it in, too.
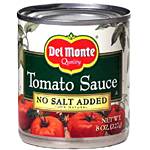
_edited.jpg) Next, layer the macaroni with the cheese in a deep casserole dish or dutch oven. Give it a stir to make sure the cheese is pretty evenly distributed.
Next, layer the macaroni with the cheese in a deep casserole dish or dutch oven. Give it a stir to make sure the cheese is pretty evenly distributed. _edited.jpg) Finally, take a peek in a corner of the casserole dish to see how much milk there is. The milk should come up about 2/3 of the side of the macaroni. We added a cup or so more milk at this point. Pat down the top of the casserole and put it in a 350 degree oven for about 45 minutes - until golden and crispy on top and hot throughout.
Finally, take a peek in a corner of the casserole dish to see how much milk there is. The milk should come up about 2/3 of the side of the macaroni. We added a cup or so more milk at this point. Pat down the top of the casserole and put it in a 350 degree oven for about 45 minutes - until golden and crispy on top and hot throughout. _edited.jpg) The beauty of this dish is that it is simple to make and hearty to eat. It comes out having a very creamy and cheesy bottom layer and a crunchy, less gooey top layer. My mom explained that this satisfied both the kids (creamy/cheesy) and the adults (crispy/less gooey) in the family. She added, however, that everyone loved the gooey pockets of cheese created by the chunks of velveeta. Genius! Like I said, I don't always give my mom enough credit.
The beauty of this dish is that it is simple to make and hearty to eat. It comes out having a very creamy and cheesy bottom layer and a crunchy, less gooey top layer. My mom explained that this satisfied both the kids (creamy/cheesy) and the adults (crispy/less gooey) in the family. She added, however, that everyone loved the gooey pockets of cheese created by the chunks of velveeta. Genius! Like I said, I don't always give my mom enough credit.Final thoughts: Although I will always love my mom's mac + cheese, I don't think this will be my go-to recipe. I just don't see myself eager to make a mac + cheese with velveeta. Sure it melts well, but it lacks character. Plus, I believe I am healthier for limiting processed foods in my diet. If I am going to indulge in mac + cheese, I want a dish that is a bit more gussied up than mom's week night stand-by. (Although, I will never turn down a dinner invitation at my parents' when mom is making hers!)
Next up: I'm sifting through a slew of recipes and will have another take on mac + cheese next week.
Tuesday, December 1, 2009
Mac 'n' Cheese Experiment
While I was in Montreal, I had lunch at a Olive & Gourmando, a local favorite in the old part of town. It was a cold day, and I could not resist their mac + cheese. Served in a mini cast iron skillet, it had just the right ratio of creamy noodles to crunchy topping and crispy, stuck-to-the-pan cheese. What really elevated this dish was the addition of sauteed mushrooms. Delicious! And with a salad of lightly dressed greens, herbs and a smattering of nuts it was heaven.
 Photo courtesy of Food Network (Alton Brown's recipe)
Of course this got me thinking about mac n cheese in general. I don't have a tried-and-true recipe in my arsenal, and this is troubling. (I think you can see where this is going.) So, for the next several weeks - as long as it takes - I am going to throw caution to the wind and indulge in a mac 'n' cheese experiment to find my ideal recipe.
Now, in thinking about this experiment, I have to draw some parameters, lest this become a multi-year project. The goal is not to make the richest, most over-the-top, or most unique variation of mac n cheese. Conversely, I am not trying for a "light" or "healthier" version. The goal is to find a great basic recipe that could be tinkered with in the future. So, all of you who immediately suggested that I include bacon in the recipe may be disappointed. (But please feel free to do that to your own arteries and report back.) That said, I am not promising that there will be no additions like the mushrooms that enhanced the Montreal mac + cheese. But they have to be things that will not deter me from making the recipe in the future - like cooking a pound of bacon and it's health implications most certainly would.
Finally, I will be testing different cheeses, but not any cheese that started it's life as powder. Apologies to those of you who are fans of the blue box. Does it have it's own special place in the pantry? Sure. Just not in mine. Anyway, I am looking for something that will emerge bubbling and golden from the oven and that rules out the blue box.
Anyway, tune in tomorrow for my first mac n cheese adventure.
Subscribe to:
Posts (Atom)